Start an Amazon Web Services computer:
This page shows you how to create a new “AWS instance”, or a running computer.
Start at the Amazon Web Services console (http://aws.amazon.com/ and sign in to the console).
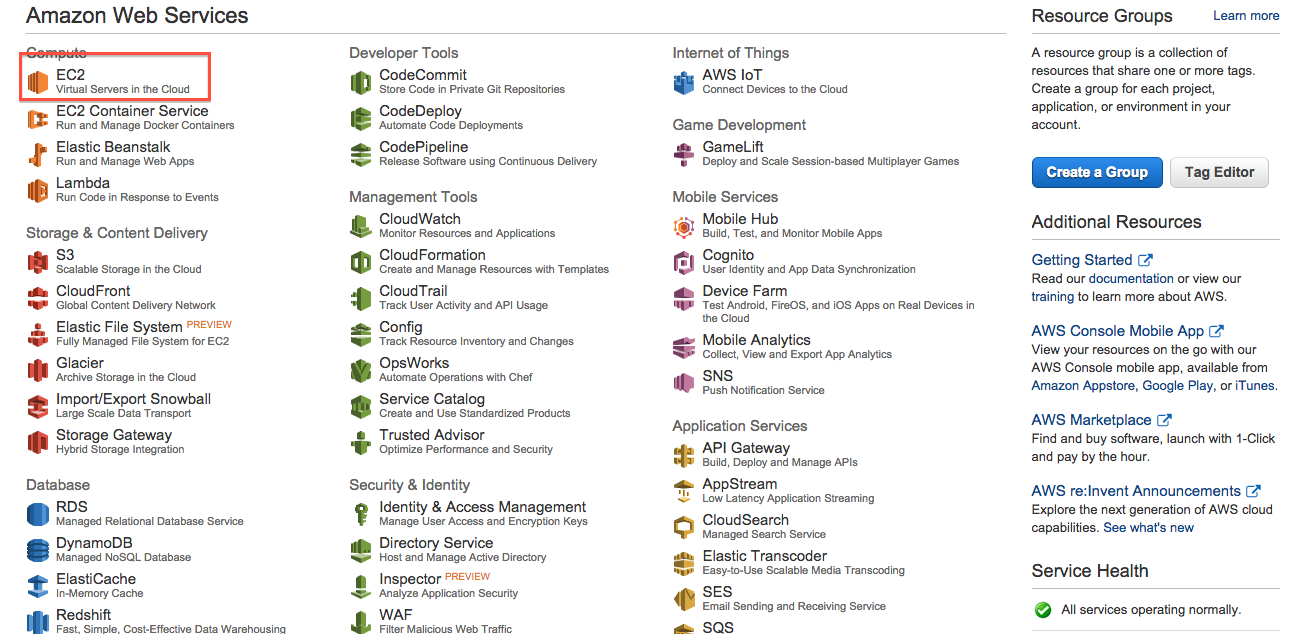
0. Select “EC2 - virtual servers in the cloud”
1. Switch to zone US West (N California)
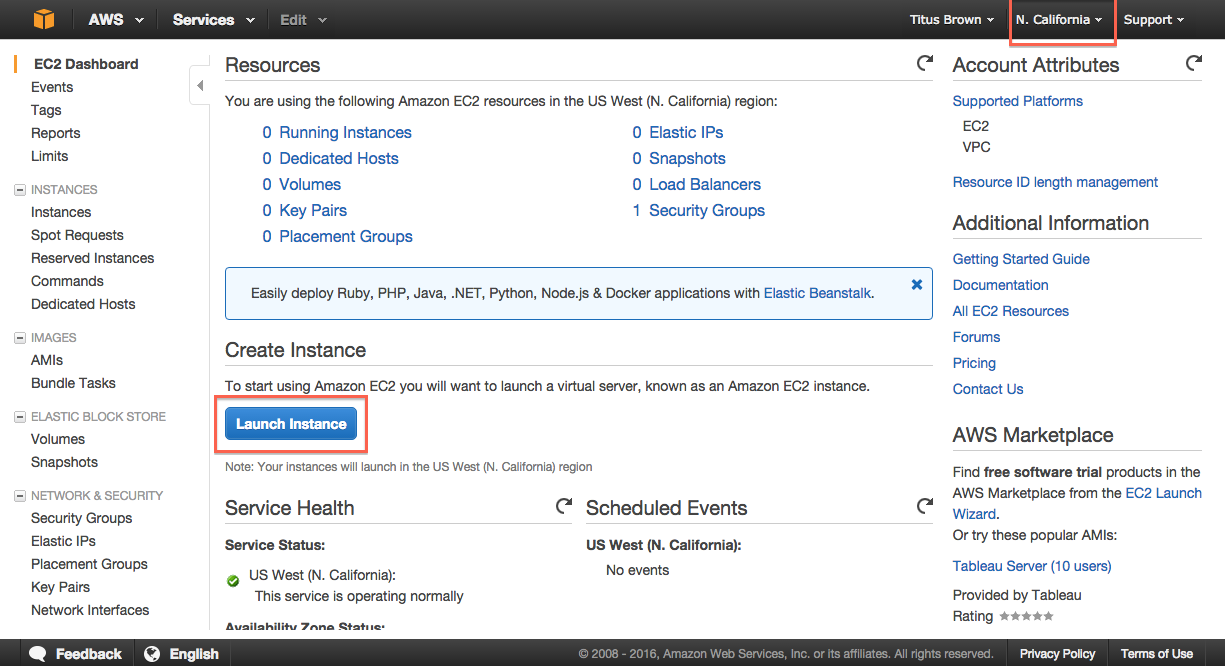
2. Click on “Launch instance.”
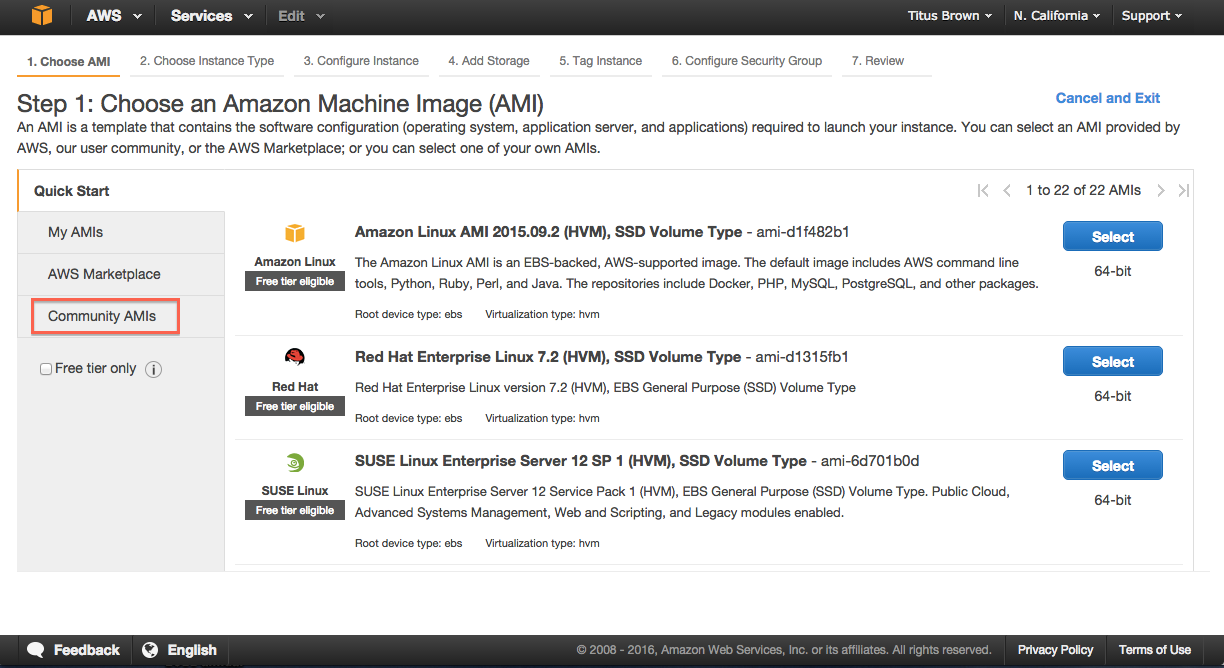
3. Select “Community AMIs.”
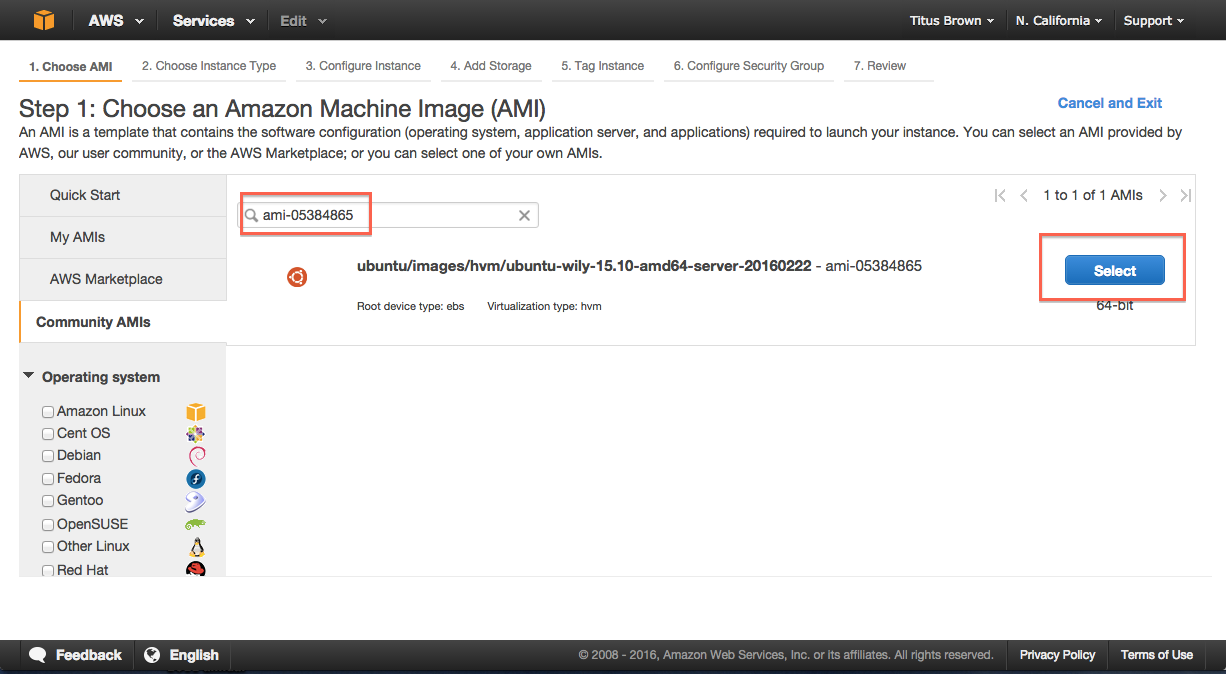
5. Click on “Select.”
6. Choose m4.xlarge.
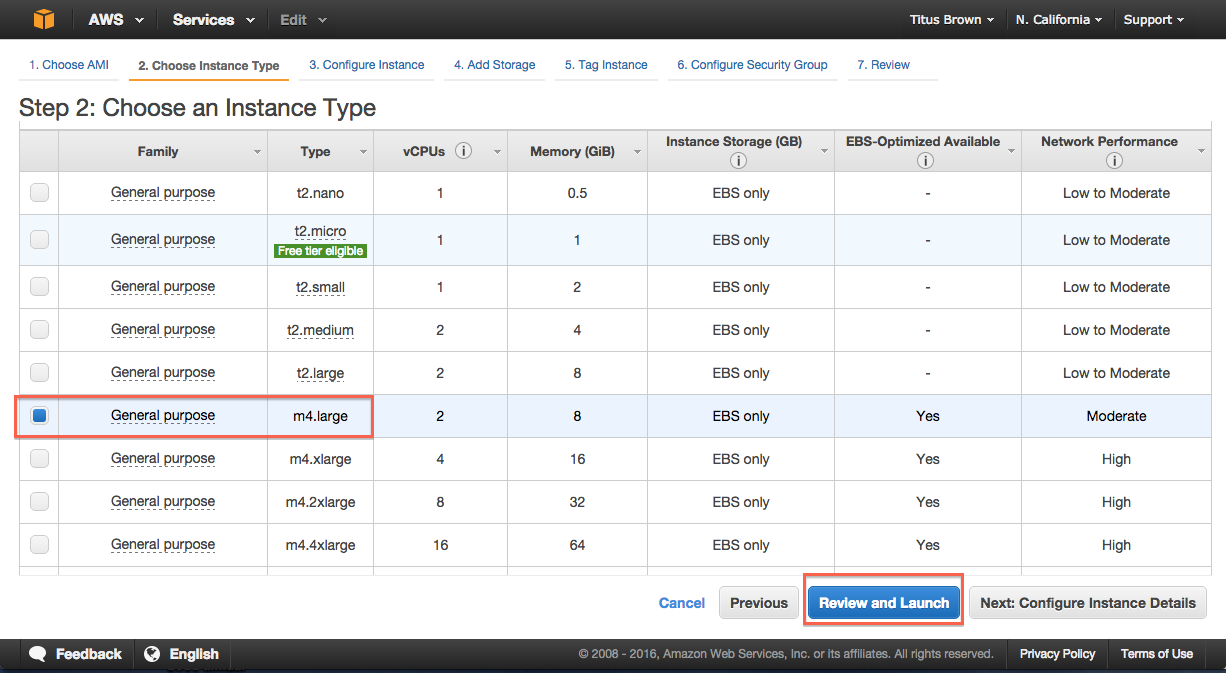
7. Click “Review and Launch.”
8. Click “Launch.”

9. Select “Create a new key pair.”
Note: you only need to do this the first time you create an instance. If you know where your amazon-key.pem file is, you can select ‘Use an existing key pair’ here. But you can always create a new key pair if you want, too.
If you have an existing key pair, go to step 12, “Launch instance.”
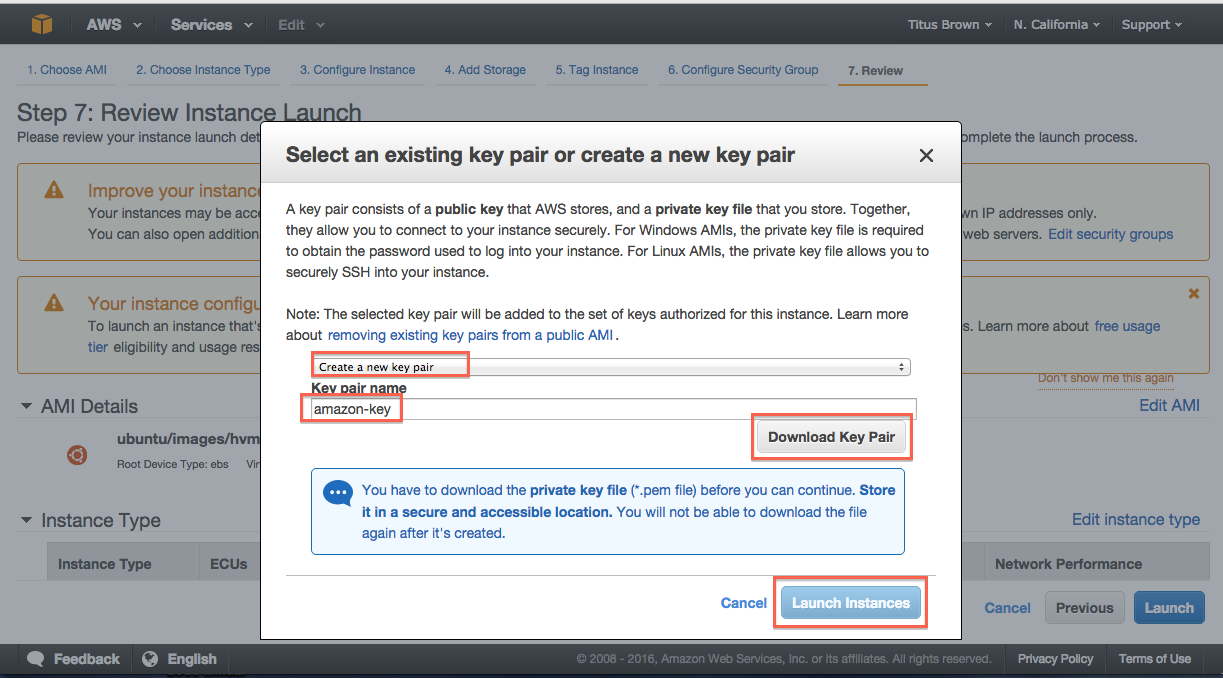
10. Enter name ‘amazon-key’.
11. Click “Download key pair.”
12. Click “Launch instance.”
13. Select View instances (lower right)
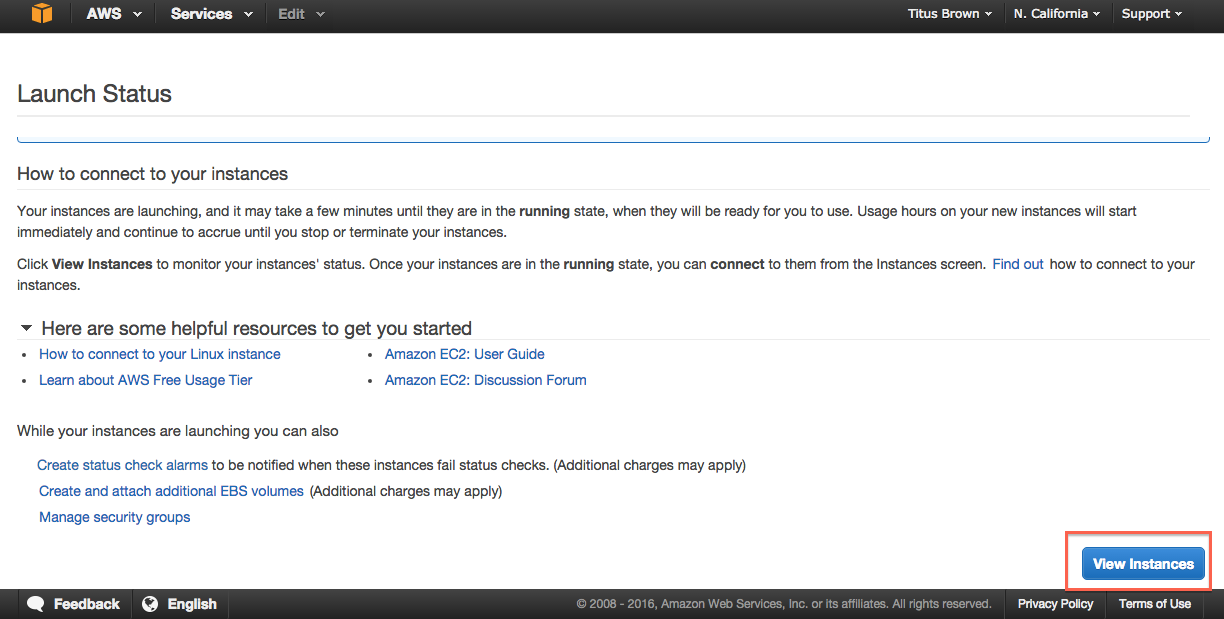
14. Bask in the glory of your running instance
Note that for your instance name you can use either “Public IP” or “Public DNS”. Here, the machine only has a public IP.

You can now Log into your instance with the UNIX shell or Configure your instance firewall.
LICENSE: This documentation and all textual/graphic site content is licensed under the Creative Commons - 0 License (CC0) -- fork @ github. Presentations (PPT/PDF) and PDFs are the property of their respective owners and are under the terms indicated within the presentation.